The Invasion – Time to Animate!

There is a side project I do with my sister Asuman. A stop motion film “The Invasion” I posted about this film here before. Asuman finished all and has sent me. I received a box full of effort, full of love… I have seen closely how detailed Asuman worked on this set. Each piece was created very detailed, carefully. Now, it is my turn. I need to remunerate for her great effort here while shooting this film. I am going to be getting ready this week. And I will probably start shooting by the end of the week. I will keep you posted. There were 2 gifts inside that box too. You see at the bottom right of the picture. Owls at the top is for Hakan and me. The duck family is for Zeynep. As you might guess Zeynep loved what her aunty created for her. Thank you sooooo much Asuman!Anyone interested can check out the animation process here at The Invasion I will post as I proceed..

Problem with Liquid Latex Buildup Parts

I had a problem with the hands of Adem and claws of Kush I previously made in June 2009.  Those were both fine when I first built up but after couple of months those started to get sticky. Hands became like the ones of a zombie puppet and it is not possible to hold claws because of those being too sticky. This is how I made these:

Hands: I mixed liquid latex, acrylic paint and pros-aide all together… Dipped yarn covered fingers (also there was epoxy putty on the fingers and palm) into that mixture several times to make the skin.

Claws: Yarn covered fingers and acrylic painted cartboard claws dipped into liquid latex several times.

I posted about the problem on stopmotionanimation.com Here is the link of that thread: … (edit on Jul 2015: that thread does not exist anymore..)
The problem with the hands seems like is me mixing pros-aide and latex. Liquid latex is a great material to create skin for the puppets. But there are some importants things to remember when working with latex. Please check out the above URL for more.

I have remade the hands. Used PAX paint. Many thanks to Darkstrider who wrote me about that on that post. If you are interested you can check out the forum URL above.

Claws of Kush are still waiting for me to be fixed. I only used latex on the claws so I am not sure what was the problem. I am going to make a test part by using only latex. There are the PAX painted hands I have aready made. So, I will be able to see what happens to these parts in a couple of months before I start animation.

http://youtu.be/luWDdYGkpGk.

The Walk !?…

I have been having a lot of fun animating and making a video. Walk cycle test… Hmm.. you will see the result above. And post production with my old friend After Effects to make a full HD video for youtube. After all is completed and I uploaded video to youtube, I have found out that youtube pics up the frame in the middle of the video as a video still automatically and there is no way to change it.. So, next time I make a video to upload youtube, I will put the film title right in the middle of the video !?…

Edit: Just published the post and tried viewing video. If you have hard time viewing video here, you can click here to view in my youtube account..

Adem

Adem… My next post will be about the Creation Of Adem. There is a lot to post so I think a separate one for the pictures could be better. Here some pictures I have just taken. You can click to enlarge.

.

Camera Move Test, Lighting, Lumix FZ50 & AnimatorHD

I have been working on lighting for a while now. First of all I would like to thank Darkstrider who has been huge help about lighting and using Lumix FZ50. When I first started, I did not know much about lighting a stop motion set. Now, I have some ideas about which lights I would need, how to setup those lights and which other materials I may need to achive a good lighting. Next comes using the camera to “take” that shot correct. So, a lifelong homework… experiment different lighting setups and try the best camera settings.

Let me start with the short animation test I made: -see above-
As much frames as possible I could get with a tripod. What do you think?

Lighting:

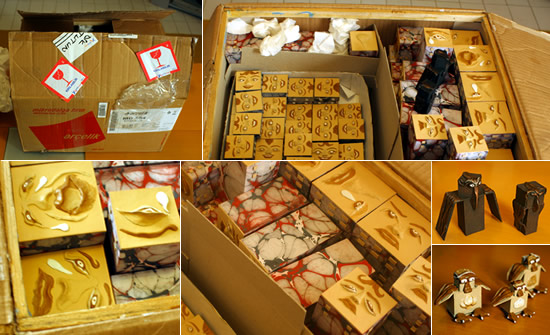
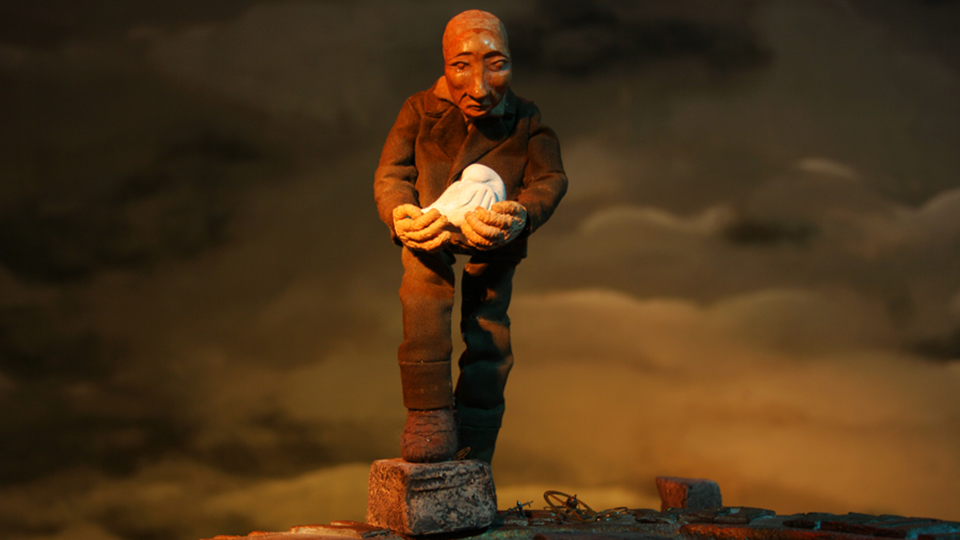
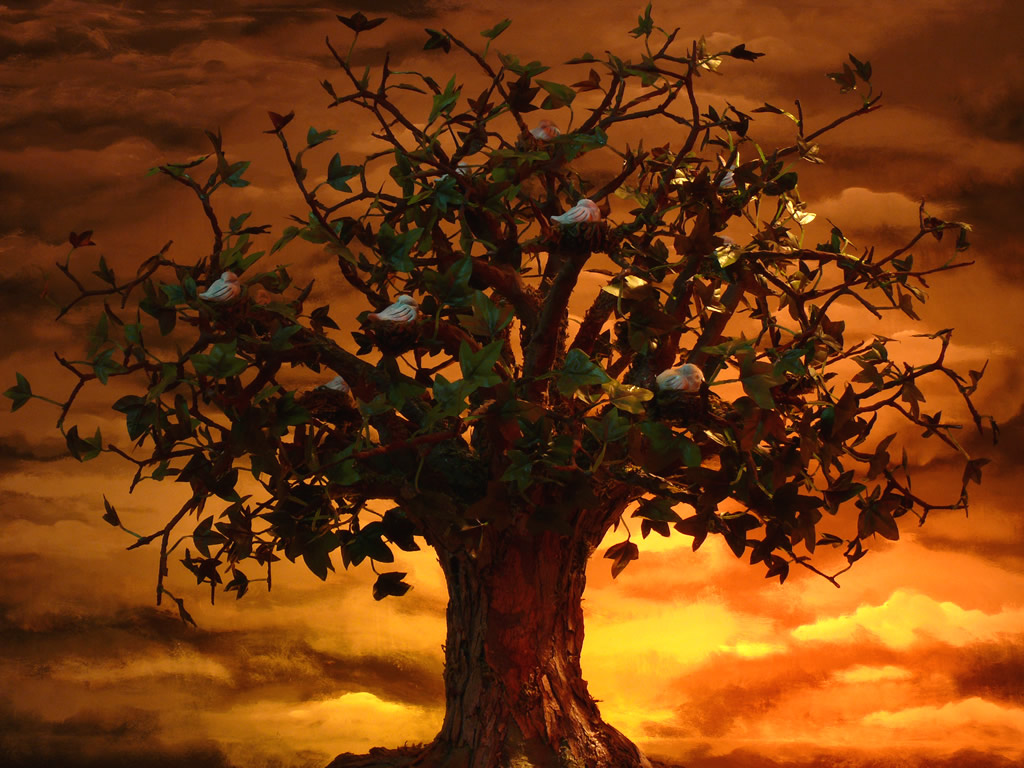
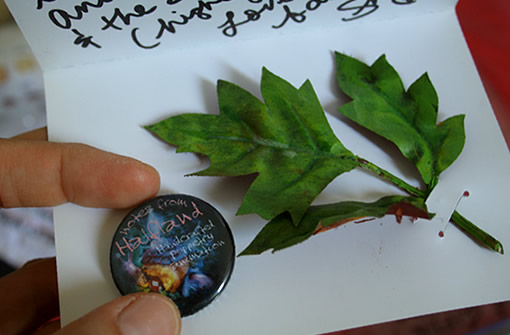
To get this sunset like lighting the idea was: orange as key light, blue as fill light, red and blue as back light. I did not want to get an exact sunset look. Some time maybe right at the end of sunset.. little more darker and I wanted to add another light from the top right maybe as a moon light. That time of the day is too early for a moonlight but wanted to have that light there… Here is a picture of tree as a whole. You can click picture to enlarge.

Stop Motion Lighting test

And almost forget to write; I painted another background. This time a black and white sky. I will not use this in the actual film either; just for testing.

The most amateur lighting setup I have here. There are 5 lights. One regular house light on the right side as a key light. First covered with baking paper and then yellow, red (to get orange) transparent kite paper and then black crepe paper at the top to adjust the light intensity. A blue pin spot on the left as a fill light with baking paper as a diffuser and hanged on an umbrella stand. Between background painting and the tree, at the bottom; there are 2 back lights: one red pin spot with a baking paper diffuser and one regular small house light covered with baking paper and yellow kite paper. On top of these 2, there is a black crepe paper again. There is another transparent pin spot on the right back with kind of a gobo made with a black tape. I used a broken tripod to make a stand for this spot. This kind of setup can not be used to shoot the actual film for sure but worked very well for me to test some lighting ideas.

Stop Motion Lighting

So, this is what I would do for my film set in terms of lighting: I will buy some better lights. Nothing like fancy expensive ones.. Maybe a spotlight and then make some barn doors etc,.. There are some great ideas both Mike Brent gave me also I read on stopmotionanimation.com I might use these pin spots; only need to make some flicker tests. I will definitely buy color gels and also ND filters. I tried to make substitues for these but no way to adjust light as the way I need and also using materials like kite papers are dangerous.. you know those can burn easily and should never be left for long times while the lights on.

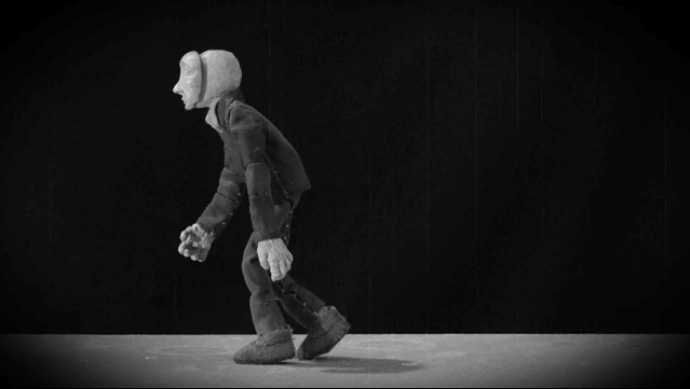
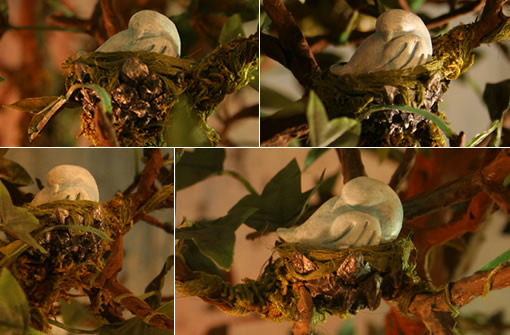
This film is going to be dark. I want a very dramatic look. I have been thinking about even shooting black&white. There are some tests below here:

Stop Motion Lighting Tests

See the black and white one on the second row. Here I tried to get a “Dore Lighting” (another great information from Darkstrider) Picture quality is not very good but I like the dramatic light change on different parts of this picture. Again, you can click picture to enlarge.

Using Lumix FZ50

This has been the first time I have really tried Lumix on animation. It works pretty well. Even though I had those funky lights I almost did not get any flicker. Just a little and I think it is because of the regular house lights I use. It took me for a while to really understand how this camera response different lightning setups. I heard people saying that Lumix does not work well under low light conditions… Nonsense!! As long as you adjust the shutter speed and F stop correct; allowing long exposure times; camera works great. The only problem I could not get over was the noisy picture quality in full size. FZ50 can shoot 10mp at 4:3 aspect ratio and 7mp in HD. When I view the 10mp picture in full size, I see the noise. But, I never need to use that 10mp one in full size. When I make the picture smaller I get a full high quality picture for my film.

The most impressing thing for me to see how “focus lock” feature works great. You know, you need to use everything manual when you shoot stop motion. I was curious to see how Lumix stays in focus in manual focus mode. You first manually adjust the focus and then hit focus luck button. Then voila.. you have a focused camera even if you turn it upside down.. kind of like what i did here to shoot.

Here are the settings of my camera during this shooting:

ISO 100
F stop 10
Shutter speed 5sn
White Balance: Tungsten

So, again thank you Darkstrider for helping me out for the right settings! Also my friend Mert here showed me how to adjust some settings and was very helpful.

Animator HD Personal:

This is the software I am using to shoot stop motion. My previous tests was without live view (with Canon) and I am suprised to see how much a frame grabber makes things easier. Lumix connected to PC with a converter sending live feed to Animator HD. Taking 2 pictures for one frame; one from AnimatorHD and another with a wired remote from camera for full resolution picture to be stored inside the card.

Camera Movement:

I shot these frames using my new tripod with a 3-way adjustable head. I knew this was not going to be smooth enough but wanted to use before I make a slider for the camera. I am not after a very smooth animation but definitely want to achieve something better than this. I also tried ease in/out but no way with this tripod. Hey I am also learning how to animate 🙂 Stop motion… a complete challenge for me; learning, learning, learning… how nice!!

So, I need to plan scenes carefully and make a camera slider.. maybe couple sliders for different parts.

——————–

And as always, here is my little bunny woke up around 4 in the morning while I was working on lighting. Came to my room with her “kuzu” (means sheep in Turkish) in her hand and said that she wanted to make a film too 🙂 Then suddenly she decided to be an actress and here is the result…

.

The Invasion – Set work almost done

The Invasion. This is a film I am making with my sister Asuman. She has been working hard to get things together on the set. It looks like I am going to be shooting in a couple of months. This is going to be an interesting small film showing the human invasion… Asuman is a graphic artsist who likes to experiment different things in art. She has been doing some beautiful “ebru” and her idea of making a stop motion film using her ebru sounded very interested to me. So, we are getting there… She has one or two months work before sending me all the pieces. I am so excited to shoot soon..

An Amazing Bird Puppet!

http://youtu.be/FxudKL1IB6U
Someone on stopmotionanimation.com message board posted the URL of a music video by Bowerbirds a while ago. There is an amazing crow puppet here. He said that he made the armature for the wings. I asked him if he could send me some photos of the puppet before it was foamed and feathered -which he offered in the first place- but he could never get back to me. I love the  puppets, animation, effects, music… just everything here.

Thanks to that person who showed me this video and kudos to him & every other people who worked on this music video!.

Birds in the Nests, Nests in the Tree

Yes, it is finished… Tree of life, birds, nests. I will work on the roots when making the rocky surface but other than that all done. You can click to below picture to enlarge.

tree of life

It is 4:35 in the morning. Another stolen night to spend on stop motion is almost over. Away from my all duties; taking care of my daughter, working to make money, taking care of the house, cooking, doing dishes,.. 🙂 I feel like every moment I spend on this film is a stolen one and I think I like to steal a lot! Anyways… a beautiful end summer night; sitting in the garden with mosquitoes, hearing cats fighting in our neighbor’s garden, feeling good after preparing pictures to post here.

Ok, what I have done lately and how I done;

Making of the “Big Bird”

I made some small birds to place in the tree of life representing the “souls” out of super sculpey and posted here previously. I needed one to animate. Nothing complex; just one bird to be able to raise her head. Here you see her:

Super sculpey again. But made the head seperately, connected to body with a piece of wire. Glued some foam. Covered foam first with “real fleece” which Shelley sent me 🙂 and then with some goose quill from our sofa.

She is nothing like the “Big Bird” from Sesame Street but somehow she reminded me of Big Bird at the moment I finished her.

Bird Nests..

This was challenging. Needed to look like bird nests but at the same time I wanted these to be strong; as being home for the souls. Metal but comfortable. After trying some different ideas, I ended up using pine cones. And boom! Cutting pine cones was harder then cutting steel… I am serious. Have you ever tried cutting pine cones with Dremel? I broke many blades made for cutting metals. Dust, smell,… had my respirator and protective clothes to keep myself safe 🙂

I painted cones with black acrylic and then stainless steel colored acrylic paint (which Shelley  sent me. Thank you!!) Dyed some raw looking yarn into green with acrylic again to tie the metal cones to the branches. Added moss around the nest after tying up.

Tree of Life Mooodddiifficccaattion:

Collected some bark, killed the bugs with mosquito spray inside a bag. Left those in the air for couple hours to get rid of the poison. Covered the trunk with these barks and the glued moss all around.

I use old newspapers to keep the table clean. As I was working on the tree, I saw a small article right next to the roots of the tree about “Tim Burton” There is a Tim Burton exhibition at MoMA between November 22, 2009–April 26, 2010 No way for me to go as NY is kind of far away from where I live 🙂 But, anyone living in NY and have not heard about this exhibition can check details here http://www.moma.org/visit/calendar/exhibitions/313

Made many more new branches, added to the tree. Glued some more leaves.

The last picture on the right bottom is showing the quick background painting I did today to shoot the tree. The final background will be more like a real sky. This one was just for fun..

Back to Tree of Life

It has been a while since my last post about the film. I have been having a very busy summer; spending time with our families in July. At the beginning of August, our babysitter quit working -she’s getting married- and my daughter started to go to kindergarten half day, 5 days a week. So, we have been trying to get used to our new life.>

After taking a long break, I wanted to start with modifying the tree of life and making the small birds which represent the souls left their bodies after death and waiting for their birth again. Tree of life is a motif in various world mythologies and the birds sitting on its branches often associated with the souls. So, here they are:

On the bottom right, you see a quick installation of the bird onto a branch. I am currently working on these and will show final pics of tree of life and birds with my next post.

 I made these birds out of super sculpey. There are 15 birds sculpted and cooked. The necklace on my neck is a gift from Shelley… a bird nest and the egg; giving me luck and love for stop motion, for life…

Painted with white acrylic first and then used blue antique powder paint for an older look and some dimention. And ofcourse my little assistant was there to help me out 🙂 By the way, the Tree of Life oil painting on the wall is a reproduction of one of Natasha Wescoat’s which I painted when I was pregnant to Zeynep.

Modification of the tree: I made some new brances and smaller leaves. I was not totally happy with the previous look. Now, it looks a lot better and I will post new pics later..

From Halfland… From Shelley..

This morning, I have received a pack of love, friendship, warmth, life, support, goodwill, happiness from the land of Halfland. A treasure came all the way from California. It was one of the most emotional moments in my life.. opening up the envelope, seeing all those beautiful things she sent me.

I met Shelley after following up her process to make a tree for my film. Coincidence… after months, I was working on tree of life again and the package arrived. The 2nd Halfland button, leaves from the Answer Tree, stop mo water gel samples and many other things treasure besides the gifts she handmade for us!

I really do not know how I can thank you Shelley. You are there lighting up my path….