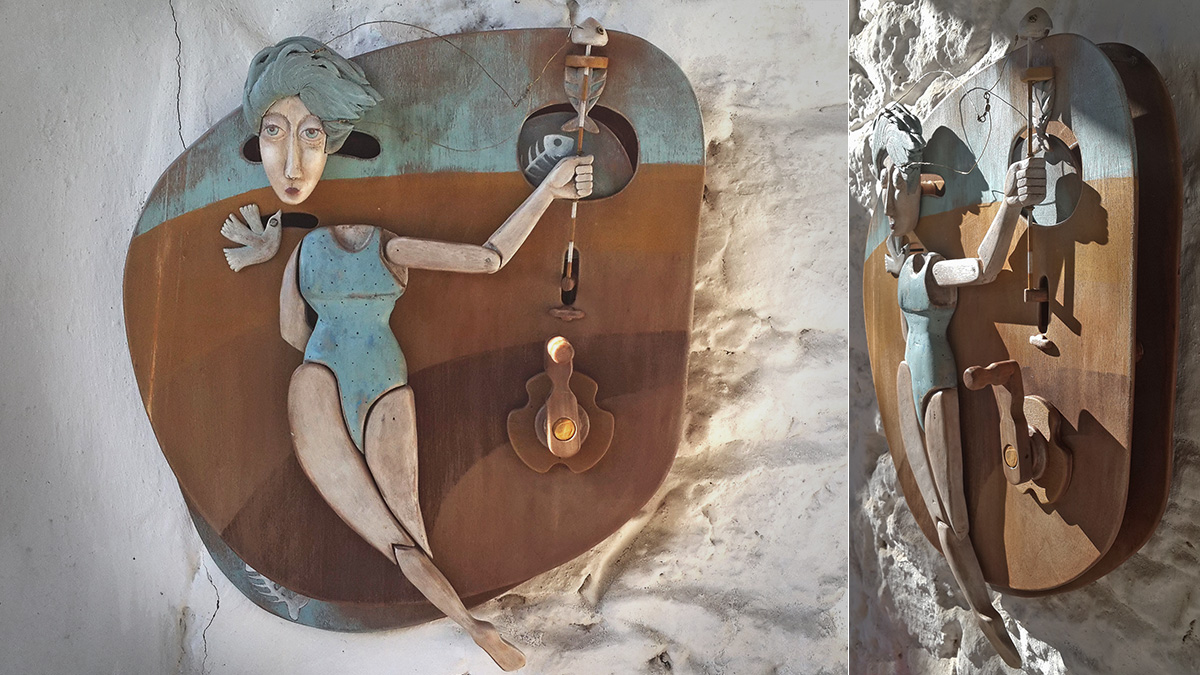
Finally I am posting here about Kiftaro. I started making handmade wooden automaton couple of months ago. There was another try dated back couple of years ago when I was working on my stop motion film. It was going to be a carousel but I just made some wooden gears, etc.. and did not finish.
Here is a quick video. Lighting was not good. Shot with a cell-phone and edited using windows movie-maker because of the problem with my actual editing software. Next videos will be better hopefully. BTW, hands belong to my hubby…
Making of Kiftaro took some time. Even though I knew about mechanics and working with wood, had some hand tools; it took some time for me to find the right materials. Which kind of wood to use for what part, screws, rods, wires…
Automaton Mechanism
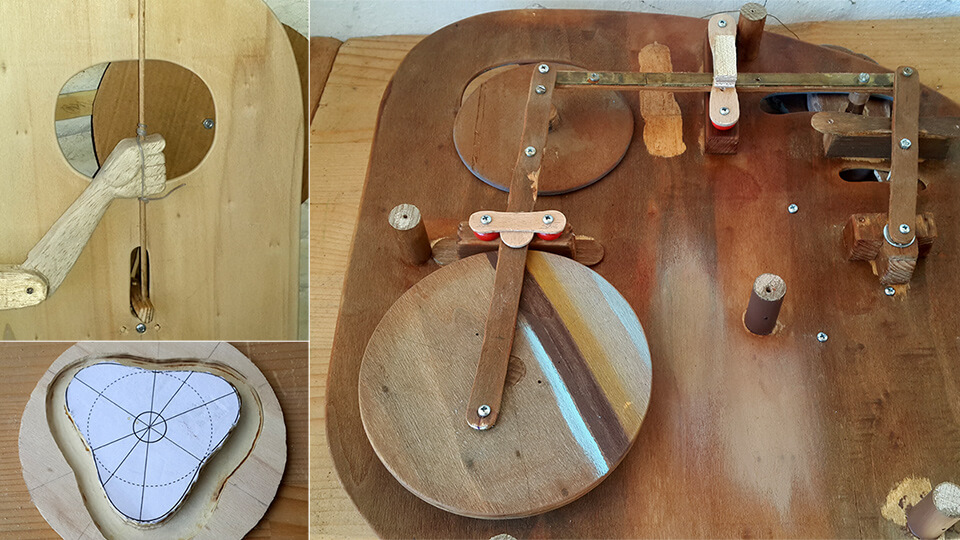
There is a linkage mechanism working behind. Rods connected to a crank. For the up/down movement of the fish there is a cam and follower. I transferred movement from back to front. I started out with drawing the mechanism in the computer. And then made a prototype using mdf wood. It was a simple one but helped me a lot to overcome the problems I ran into while applying the drawing from computer.
I am not a kind of artist who produce exactly what she sketches at the beginning. I start with sketching and the piece shapes itself along the way. When I first see the end result, it is like seeing someone for the first time in my life. So, same happened for Kiftaro. The design was very different on the paper and computer screen. After I carve pieces of the puppet and put together, meeting her was a joy for me and for my daughter as well. My daughter Zeynep is 8 years-old. I really like talking to her about whatever I do. We have discussions over the design, art, etc… Kids are just amazing! Sometimes she comes up with some ideas from another universe. You know… So, when she looked at the first montage of this piece, she said “Kiftaro”. I did not know what was she talking about. She said the name of this puppet was “Kiftaro”. There is no meaning in any language.
Painting Automaton
Painting part was fun. I like working with new, old, used, any kind of wood and try making it look very OLD. As if the thing got old over the time. Wabi-sabi… Let me not get into this right now. I will make a separate post about this beautiful Japanese philosophy.
So, going back to mechanism: I studied textile engineering. Kind of like textile machinery engineering. Mechanics was one of the subjects I liked a lot. But over the years, I did not use my knowledge except 4 years of engineering career. It has been 20 years.. So much huh!! Now I am familiar with automata mechanisms but barely remember details. I drew this simple linkage mechanism for Kiftaro. But for complex ones I am studying the resources I have found on the net. Hey.. another post to come about resources.
Here she is Kiftaro. I like this as a first piece but not sure about style. I have completed another one which is in a totally different style. The next one I started thinking about will probably be a mixture of these two in terms of design style.
Making of Kiftaro Automaton:
Pictures are self explanatory. Please click thumbnails to enlarge.
There is a wooden duck without the head on the second picture. A friend of us found that on the street and brought for my daughter. It was a perfect thick balsa for puppet’s pieces after Zeynep’s permission ofcourse…
I use Dremel and carve in hands where needed. All works fine but just soo much dust with Dremel. Oh well….


7 replies on “My First Automaton – Kiftaro”
Ablam harikasın!…
İnanılmaz…
Tebrikler…
Teşekkür ederim!!!!! 🙂
Wow, what an amazing post!! I’m so glad you captured the video, and all the great pictures! So – you studied engineering and worked in that field for a while? No wonder you know how to do this!! I’m completely baffled by how someone could design something like this!! You obviously put a great deal of work and effort into this and it really shows. I especially love that you carved it all by hand, using specially selected woods, and detailed it so lovingly. I especially like the cracked paint effect.
Lol oh oops!!! The cracked paint effect isn’t on the finished automaton. It looks like you found a piece of wood with some really cracked paint on it and then sanded it off – I was going to ask you how you got the paint to look like that ha ha! It’s in the 2nd picture. Anyway, I was thinking this reminds me of something Jan Svankmejer and his wife Eva might make (only they would have included the cracked paint in the final piece).
Mike, thanks a lot my friend! That cracked paint effect… yeah I sanded it off. There is a special primer/paint for making crackle paints. I have a “Cadence crackle paint”. I guess in USA there are different brands. Here is a nice video to explain the process: http://www.youtube.com/watch?v=krl_jAWW40o I do not like crackle effect when it is used on a large surface. It does not look natural to me. I like it when it is used on only a portion of a piece. On the right spots where the paint can be cracked naturally.
I love your note about Jan Svankmejer and his wife Eva. I am definetely influenced a lot by the stop motion masters. Especially Czech artists. Reading your comment about this made me very happy. So, I was able to reflect the feeling a little. Yeah, they would include the cracked paint in the final piece soo naturally. Maybe I can try for the next time.
Incredible, Yaz!
Thank you Shelley !!